blog hello artwork press

November 23, 2011

Paper Lantern Light


This floating bedside lamp is made out of three inexpensive paper lanterns and a light socket cord. To free up floor space, I hung it on the wall using leftover ribbon and wall hooks.   
Materials
-paper lanterns
-light socket cord
-screw hooks
-ribbon 


November 8, 2011

Jean Pocket Organizer


In the spirit of frugality, I made a wall mounted organizer made from my husband's old jeans. It's hanging in my son's room and is perfect for storing books, toys and other knick knacks! This sewing project was inspired by Martha Stewart's Shirt-Pocket Quilt


October 6, 2011

Mini-Backyard Moss Terrarium

Terra (earth) Arium (enclosure for safe keeping)

I grew up on an island where Summers' were endless. Now living in the Northeast, the leaves are starting to change colors and winter is approaching. So, before the greenery fades I'm bringing a piece of summer indoors via a terrarium.

Supplies:
glass container
pebbles, sand or gravel for drainage
activated charcoal to keep air and water filtered and fresh
dirt or potting soil
moss

1. Find a glass container you like. I used the pear shaped one with the wide opening because I didn't have any activated charcoal on hand (hopefully with some air circulation no rotting will occur). 

2. "All good things are wild, and free." Well, not a plane ticket to Italy. But you know what I mean.  Gather small rocks, I found some in our backyard. :) Then, wash and let dry.  Layer 1-3 inches to allow drainage.

3. Add a thin layer of activated charcoal if making an enclosed terrarium. Next, add soil/dirt. 


4. Go for a nice walk and look in damp, shady areas for moss.  Gently scrape it from the surface and arrange it over the layer of dirt. I used moss growing on our patio. My husband wants to remove it but he knows I love it. I'll hold on to any piece of wild growing in concrete suburbia!


4. Mist with water daily to keep moist and place in indirect sunlight. For an enclosed terrarium, don't add too much water because it creates it's own self-sustained watering system through evaporation and condensation.

Basic How-To's by Terrarium Man

Fun terrariums at Apartment Therapy


September 27, 2011

Guest Room Head & Footboard Slipcover


After


Before


 This bed set was left here by the previous home owners. Totally functional, but fugly.
Since we have no nightstands in this room, I made a simple utilitarian slipcover for the head/footboard with pocket organizers! Now guests have a place for their stuff & it cost $10 to make. cheeeehu!


August 23, 2011

Upside Down Plant in a Pant

DIY Hanging Planter

plant in a pant, an attempt at upside down growing. 


supplies: {1}some sort of container you can cut or drill a hole into. larger the container, the more room for your plant to grow. you can use milk jugs, plastic bottles, etc... i reused pots that came with the hydrangea's we planted this spring. {2} rope of any kind...i used piping cord. {3} coffee filter. {4}plant(s). i grew Tomatoes on bottom and Morning Glory above. {5} PANTS!


first, fit pot in plant leg. mark where top and bottom hit. add about an inch to the top, for a .5 inch double hem. 


 then, add half the diameter of bottom side of pot, plus 1 inch for hem, and minus about .75 inches (for opening that plant grows comfortably through).


DRAWSTRING: cut a hole in your double hem and pull your rope through it. use a safety pin attached to one end of rope to help guide it through the hem pocket.


attach sturdy handles. 

cut hole at center, about 3 inches in diameter.


 tighten drawstring at bottom


cut coffee filter halfway, to its middle. the filter will hold dirt in place but will allow the stem to grow wider.


wrap filter around base of plant. 


carefully run the greens through bottom opening. fill rest of pot with soil and hang!

August 17, 2011

DIY Pinch Pleat Curtains


Unlined Muslin Curtain Tutorial


 the windows before the curtains were put up. oh what a difference fabric makes! i used about 10 yards of white muslin, 109" width. 

first step--measure,measure,measure. use diagram(above) to help determine how much fabric will be needed for each curtain panel. each panel is a straightforward rectangle that is pleated at the top. since muslin tears straight along it's width and length, the easiest way to 'cut' the pattern is to NOT cut it at all.  simply snip at measurements and tear.


start with your rectangular pattern. hem all sides. 1.5 inch double hem on top and bottom. 1 inch double hem on the sides. (double hem: fold fabric two times at equal lengths)


after hemming all four sides, mark top of panel to indicate where pleats will be sewn. i used 6 inch pleats, folded at every one inch, with 5 inches spaced between. after you make your marks, hand sew each pleat. ahhh, it sounds so repetitive i know!


EDGE PLEAT

view from top
fold like an accordion at every one inch mark.


back view
flip curtain back side facing you, run needle through back/bottom (at the line where hem is sewn) two times, then knot.


back view
run needle the same way through the back/top, then knot.


front view
flip curtain over, front facing. do the same for the bottom/front.


MIDDLE PLEATS
top view
front view
back view
do an accordion fold, again. then, flip over so back of curtain is facing you.


back view
run needle through back/bottom two times, then knot

back view
 do the same for back/top


front view
flip curtain front side facing you, sew front/bottom

 leave front/top alone so it fans out like this.


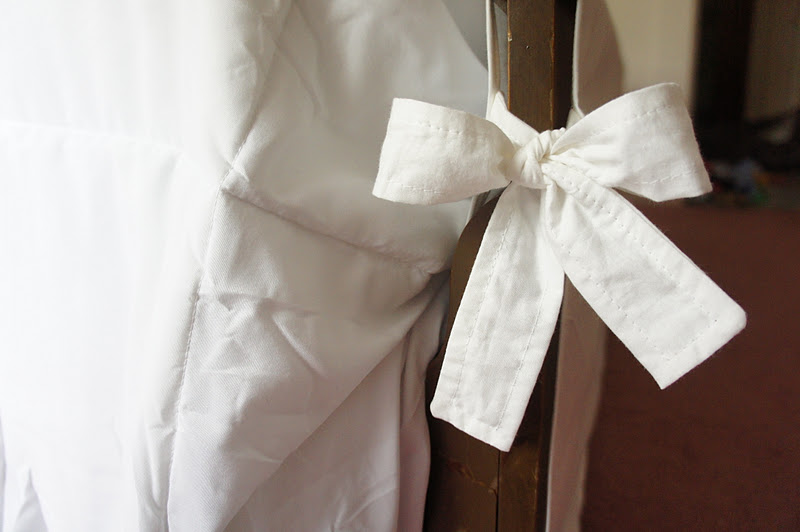
once you're done with pleats, clip on some rings..and they're ready to be hung!